What are rice pictures? Essentially, they are just pieces of paper with rice stuck to them but they killed an hour or so, and gave him some different stimulation. Best of all, I already had all the ingredients at home.
You'll need:
rice
food colouring,
paper (for the picutures)
paper towels
glue (liquid glue)
a large container or bowl.

The first thing to do it color the rice. If you have different colours, you can make as many as you like. Put rice in a bowl with a little bit of cold water (just enough to cover) and add food colouring. I suggest adding A LOT of food colouring, as it doesn't all get in there. Soak for about 5-10 minutes. Drain and rinse the colouring off the rice, then pat dry with a paper towel. leave until it is dry. I cheated by spreading the rice on a plate and putting it the rice in the microwave and nuked it until the rice was dried out. You really need dry rice.
Next. take you paper and glue (the runny kind) and draw a picture with the glue on the paper (liberally apply the glue). Next, put the glue paper in a large container, add the rice on top and shake it back and forth until the rice covers all the glue.
Next, lift up the paper and leave to dry. Viola! Magic artwork.

Pi enjoyed doing it, and all up with the washing, drying, gluing and ricing took about an hour of fun. You can also do it without coloring the rice, but I think coloured rice is more interesting.
The food colouring that I used is a powder that should be found in the baking section of most supermakets. This colour was red, which turned the rice pinkish as I didn't soak it for too long.
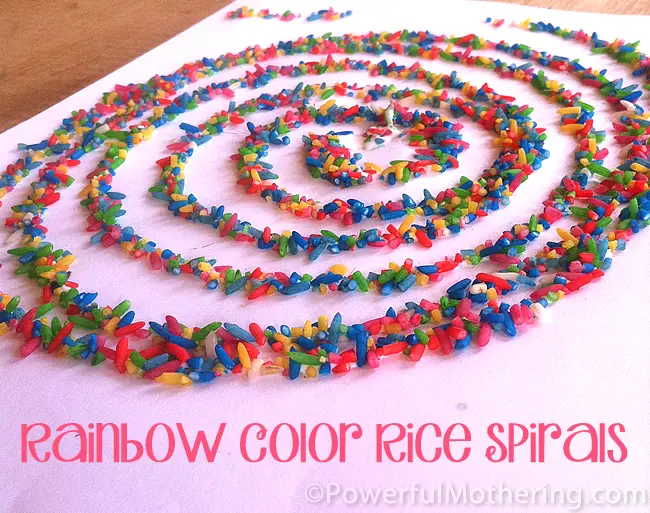
Here are some other people's pictures for inspiration:

No comments:
Post a Comment